Submitting a Declaration Direct to CDS
Overview
Any non-inventory linked declaration can be submitted direct to the CDS system.
Only inventory linked declarations need to be submitted via the appropriate Community Service Provider (CSP).
Whilst CDS direct does not require a badge, Sequoia requires a dummy badge to be configured with the "CDS - Direct" gateway to allow this to work.
Setting up the badge is a two-stage process; creating the badge and then adding the badge to the relevant security role(s).
Please note, all of these changes are made within the Sequoia Configuration application on the Sequoia server, as described here.
Creating a "CDS - Direct" Badge
Within Sequoia Configuration, expand the Sequoia Enterprise Management node, then expand your organisation name and, lastly, Access and Security.
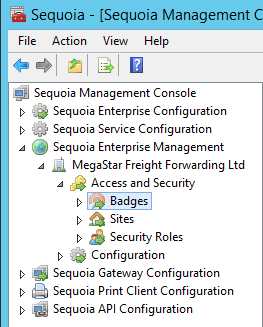
You will need to create a new Agent badge.
Right-click Badges and choose New Agent...
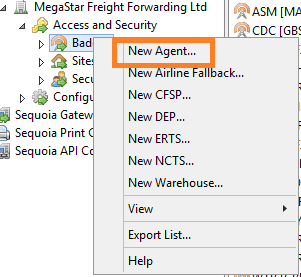
This will display the dialog to be able to enter the badge details.
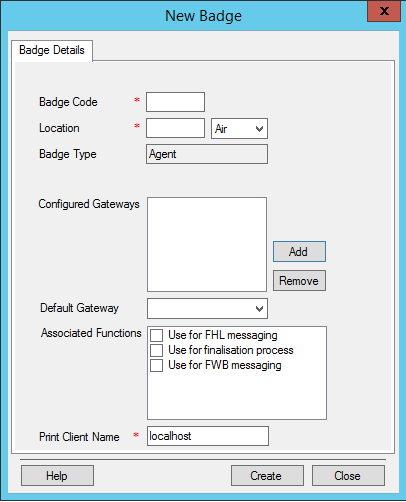
The Badge Code and Location do not relate to anything in the CDS system. They just need to be unique within Sequoia. We would suggest using something that makes it obvious to yourselves - a badge code of CDS and a location where you are based (if you have multiple offices within the UK, there's no need to add a badge for each location).
You will need to configure a Gateway. Click the Add button adjacent to the Configured Gateways list. Choose the CDS - Direct option.
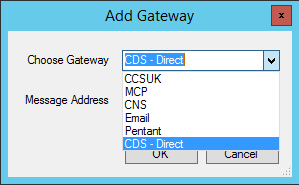
Then click the drop-down control for Default Gateway and select the CDS - Direct gateway option.
The dialog should look something like this:
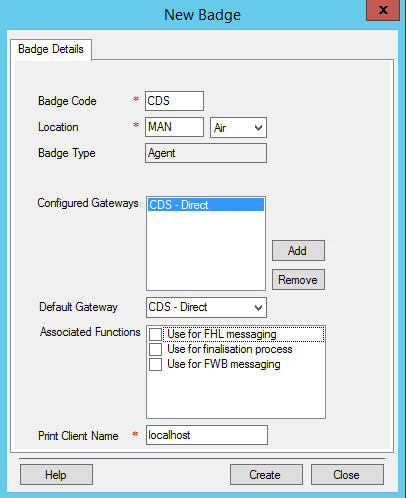
None of the Associated Functions check-boxes are currently used for CDS so should be left un-checked.
Click the Create button to create the badge then close the New Badge dialog.
Adding the "CDS - Direct" Badge to Security Roles
To allow users to be able to select this new badge in their CDS declarations, the badge needs to be added to the relevant Security Roles.
You will already have one or more of these roles created for Import Air, Export Air, Import Ocean and/or Export Ocean functionality. Note, road functionality is included within the 'ocean' role types.
The various security roles can be found by expanding the Security Roles node within Access and Security.
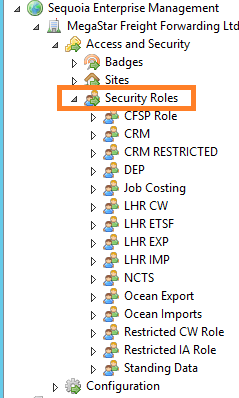
The names of the various roles will be unique for your Sequoia installation and there may be more than displayed in the image above.
Adding the CDS Direct badge to a role is the same procedure regardless of the type of role.
Right-click the role and choose Properties
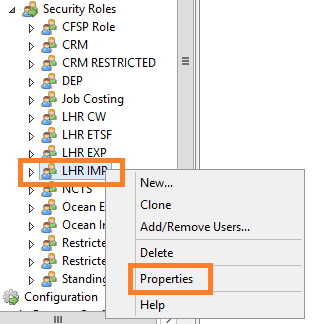
This will display the dialog editor for the role.
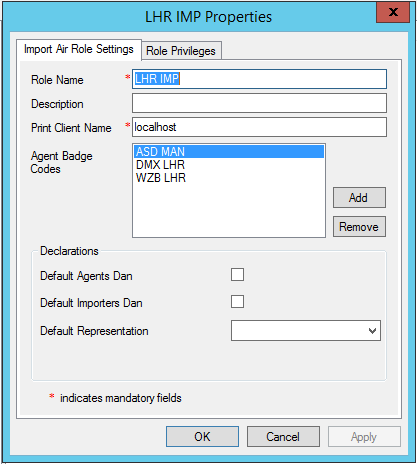
Note, the dialog may look different depending on the type of role you have selected, however all dialogs will have the Agent Badge Codes list - this shows which of your badges are already associated with that role.
To add the CDS Direct badge, Click the Add button adjacent to the Agent Badge Codes list.
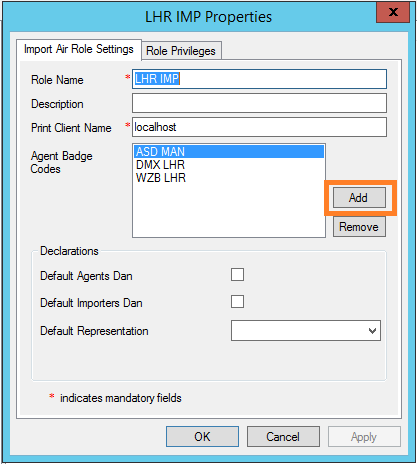
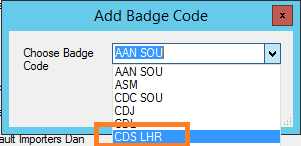
This will display a dialog with a drop-down list of all badges available to add to the role.
Select your CDS Direct badge created earlier (CDS LHR in the example below).
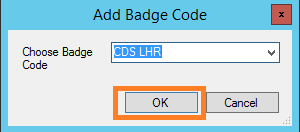
Click the OK button once you have selected the badge.
The badge should now be shown in the list of Agent Badge Codes.
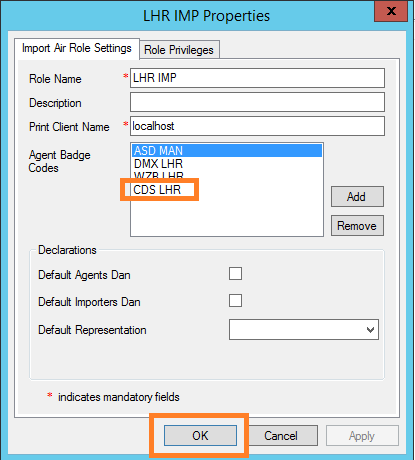
Click the OK button to save the changes.
Repeat this process for all other roles which require the badge.
The badge code will be available to users when they next load their Sequoia application.
