Getting started with CDS declarations
Sequoia supports both CHIEF and CDS declarations in the same application. You access CDS declarations in exactly the same way as you do CHIEF declarations.
Whilst the information you need to complete declarations to CDS has changed, the way you link declarations to jobs etc. in Sequoia remains fundamentally the same.
We will need to update your Sequoia licence key before the CDS declaration functionality becomes visible.
Training
We have worked jointly with BIFA (The British International Freight Association) to produce an online elearning course aimed at those wishing to make customs declarations to CDS.
Click the image below - or click [here]
Choosing the type of declaration
Whenever you want to complete a new declaration in Sequoia you are presented with the New Customs Declaration dialog (as shown below).
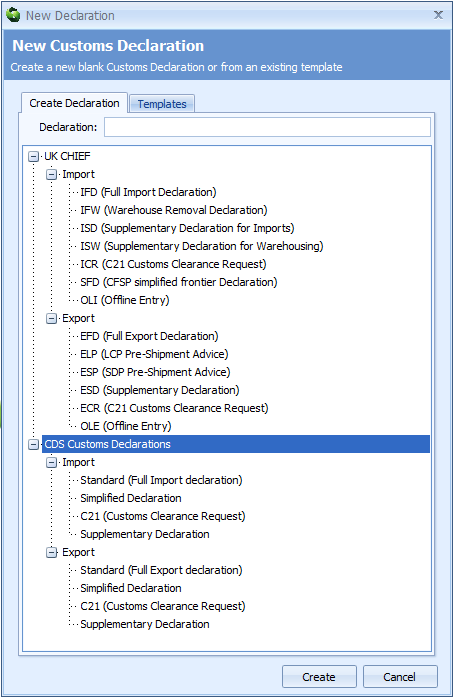
This is the same dialog as you are used to but now, once we have updated your Sequoia licence to include CDS declarations, includes all the CDS declaration types as well as the existing CHIEF ones. Selecting a declaration type and clicking 'Create' will open the declaration form in the same way.
Note that for declarations to CDS, there is only one supplementary declaration option.
There is no difference (apart from the procedure codes etc. that you use) between a supplementary declaration for import (old SDI) and a supplementary declaration for warehousing (old SDW).
The header tab of the CDS import full declaration editor is shown below.
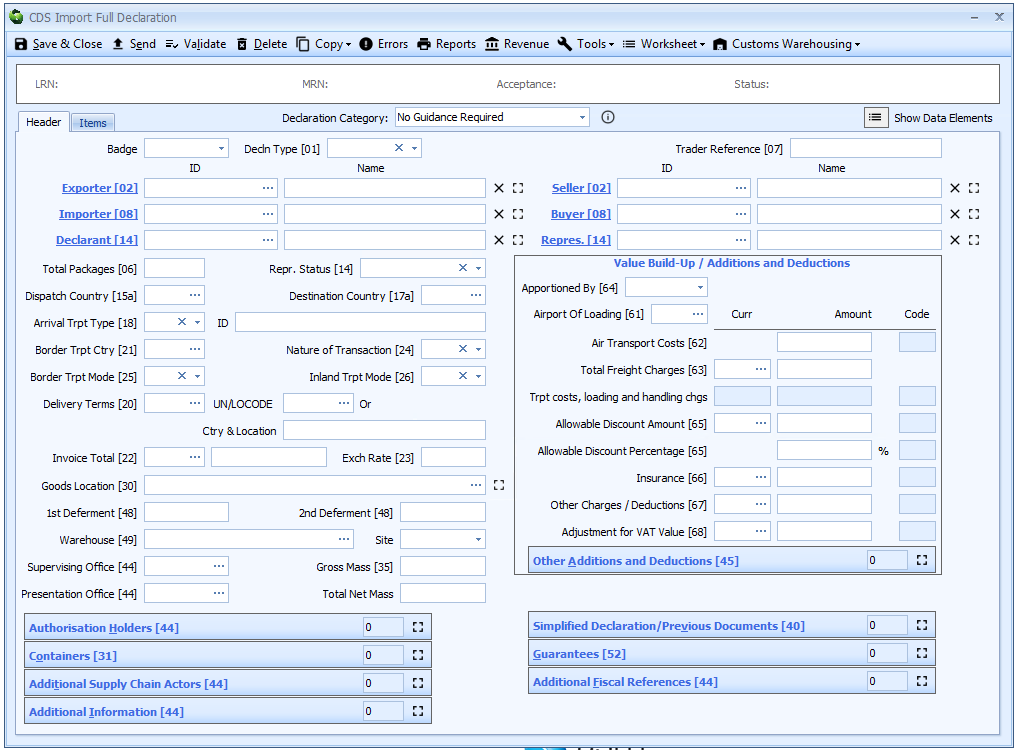
Layout of a CDS Declaration
All CDS declarations in Sequoia, whether import or export, full or simplified, are laid out in a similar way and all have the same characteristics and behaviour. This is explained below.
Summary Panel
The summary panel at the top of the declaration form - below the Save, Send etc. buttons - displays reference and status information about the declaration.

LRN
As soon as you select the badge in a declaration, Sequoia will generate an LRN (the Local Reference Number). This number is unique - within your system - to this declaration. It does not change if the declaration is amended (unless you change the badge) and is not reused if the declaration is cancelled.
It has no significance within the declaration other than as a functional system reference. It is sent in the declaration and returned in notifications from CDS, as a way of linking those notifications to the original declaration.
Sequoia generates this 22 character reference automatically in the following format:
<Badge>+<Port>+<Year>+<Month>+<Number> where:
| Symbol | Meaning | Example |
|---|---|---|
| Badge | is the badge code selected (see below) | AAA |
| Port | is the 3 character port code associated to the badge | FXT |
| Year | is the 2 digit year in which the LRN was generated | 19 |
| Month | is the 2 digit month in which the LRN was generated | 11 |
| Number | is a 12 digit incrementing number. As long as you don't do over a trillion or so declarations per month this should be OK! | 000000000072 |
For example: AAAFXT1911000000000072
Sequoia uses the badge code as a mechanism for identifying the gateway through which the declaration will be sent. Whilst the badge code forms part of this reference, it has no significance to customs in this context.
You cannot therefore send a declaration in Sequoia until you have specified the badge code. This is the same for CHIEF declarations in Sequoia.
MRN
Once a declaration has been accepted by customs, CDS generates an MRN (Movement Reference Number).
Acceptance in this context means that the declaration is essentially valid. It does not denote legal acceptance; pre-lodged valid declarations are also allocated an MRN.
An MRN is a unique 18 character reference formatted as follows:
<Year>+<Country>+<Number>+<Check digit> where:
| Symbol | Meaning | Example |
|---|---|---|
| Year | is the 2 digit year in which the MRN was generated | 18 |
| Country | is the 2 character country code of issue | GB |
| Number | is a 13 character randomly generated reference | 9876AB8890123 |
| Check digit | is a single character check digit (conforming to ISO 6346) | 5 |
For example: 18GB9876AB88901235
This MRN remains throughout the lifetime of a declaration. It does not change if the declaration is amended and is not reused if the declaration is cancelled.
It is the primary reference to the declaration. CDS does not allocate entry numbers (EPU + Entry No + Date) as CHIEF does.
Acceptance
The acceptance date/time is notified once a declaration has been 'accepted' by customs.
Acceptance in this context means that the declaration is essentially valid. It does not denote legal acceptance; pre-lodged valid declarations are also allocated an MRN.
Status
The status of a declaration will update on receipt of responses (notifications) from CDS or as a result of other processes.
Possible statuses and their meaning are as follows:
| Status | Meaning |
|---|---|
| Created | The declaration has been created. |
| Submitting declaration | The declaration is in the process of being submitted to customs. |
| Declaration submitted | The declaration has been submitted to customs and a response is awaited. |
| Communication error submitting declaration | There was an error attempting to submit the declaration to customs. |
| Submitting amendment | The declaration amendment is in the process of being submitted to customs. |
| Amendment Submitted | The declaration amendment has been submitted to customs and a response is awaited. |
| Communication error submitting amendment | There was an error attempting to submit the declaration amendment to customs. |
| Submitting cancellation request | The request to cancel the declaration is in the process of being submitted to customs. |
| Cancellation request submitted | The request to cancel the declaration has been submitted to customs and a response is awaited. |
| Communication error submitting cancellation request | There was an error attempting to submit the request to cancel the declaration to customs. |
| Accepted | The declaration is accepted |
| Accepted with Errors | The declaration is accepted but the response from CDS has notified potential errors. |
| Accepted with credibility checks | The declaration is accepted but the response from CDS has notified FEC (Front End Credibility) challenges. CDS differs from CHIEF in that an FEC challenge will not block the clearance process, CDS assumes the declared values are correct. It is not necessary to confirm the challenged values but obviously you should amend them if they are incorrect. |
| Lodged | The pre-lodged declaration is 'accepted'. Acceptance in this context means that the declaration is essentially valid. It does not denote legal acceptance. |
| Lodged with Errors | The pre-lodged declaration is 'accepted' but the response from CDS has notified potential errors (e.g. FEC challenges). Acceptance in this context means that the declaration is essentially valid. It does not denote legal acceptance. |
| Lodged with credibility checks | The pre-lodged declaration is 'accepted' but the response from CDS has notified FEC (Front End Credibility) challenges. CDS differs from CHIEF in that an FEC challenge will not block the clearance process, CDS assumes the declared values are correct. It is not necessary to confirm the challenged values but obviously you should amend them if they are incorrect. |
| Errors reported | The declaration has been rejected. The errors are visible on the declaration form. |
| Accepted on hold (document check) | Equivalent to Route 1 on CHIEF. Goods selected for documentary checks. |
| Accepted on hold (physical check) | Equivalent to Route 2 on CHIEF. Goods selected for physical examination. |
| Lodged on hold (document check) | Goods selected for documentary checks. Not sure this will occur for a pre-lodged declaration. |
| Lodged on hold (physical check) | Goods selected for physical examination. Not sure this will occur for a pre-lodged declaration. |
| Accepted on hold (document and physical check) | Goods selected for both documentary checks and physical examination. Unclear whether both notifications will be sent for same declaration. |
| Lodged on hold (DEFRA check) | Goods on hold pending an ALVS (DEFRA) check. Not sure this will occur for a pre-lodged declaration. |
| Accepted on hold (DEFRA check) | Goods on hold pending an ALVS (DEFRA) check. |
| Lodged and queried | A query has been issued by customs for this pre-lodged declaration. The declaration is held pending resolution. |
| Accepted and queried | A query has been issued by customs for this accepted declaration. The declaration is held pending resolution. |
| Lodged (Post clearance document check) | Selected for documentary checks but these will not prevent release of goods before the checks are carried out. Not sure this will occur for a pre-lodged declaration. |
| Accepted (Post clearance document check) | Equivalent to Route 3 on CHIEF. Selected for documentary checks but these will not prevent release of goods before the checks are carried out. However, the declaration will not be cleared until the documentary checks are completed. |
| Accepted on hold (payment required) | Payment of the revenue (duty/VAT) is required before release can be granted. |
| Accepted on hold (issue with payment) | There is an issue with the payment of the revenue (duty/VAT) which must be resolved before release can be granted. |
| Goods Released | Goods released but clearance is not yet complete. This could be because the debt is provisional or because of some required post-release checks. |
| Goods released (Post clearance document check) | Goods released but clearance is not yet complete. This could be because of some required post-release checks. |
| Cleared | Goods released and clearance is final. |
| Permitted to progress | Goods permitted to progress from their current location. Export only. |
| Permitted to progress (Post clearance document check) | Selected for documentary checks but these will not prevent release of goods from their current location before the checks are carried out. |
| Departed | Goods departed. Export only. |
| Departure not confirmed | Goods departure has not been confirmed to CDS. Exports only. |
| Awaiting cancellation | The request to cancel the declaration has been submitted to customs and acknowledged. Awaiting confirmation of cancellation. |
| Amendment rejected | The request to amend the declaration has been rejected by customs. |
| Cancellation rejected | The request to cancel the declaration has been rejected by customs. |
| Cancelled | The declaration has been cancelled (invalidated) by customs. |
| Handled externally – Seized, detained etc. | CDS has notified that the declaration has to be processed manually. Only used in exceptional circumstances where the system cannot handle the declaration. |
| Cancelled | Cancelled (invalidated) CDS declarations in Sequoia are still visible in the application, unlike cancelled CHIEF declarations. |
Declaration Category
Immediately below the summary panel is a drop-down list allowing you to select a declaration category.

You can select a declaration category from the drop-down list using the ![]() icon to the right of the box.
icon to the right of the box.
If you select a category here, this guidance will take the form of ‘low-lighting’ controls (changing the background of the control from white to grey) which are not deemed necessary for that category of declaration and these controls will not receive focus when tabbing through the form.
This is for guidance only. It will not prevent you from completing information that is not strictly necessary for a particular declaration category.
However, all controls will remain editable should you wish to supply the information and will be included in the declaration made to HMRC.
Changing the required category or switching to “No Guidance Required” will not remove any of your data. Indeed CDS is less rigid than CHIEF in that it will normally allow more data than required to be submitted in a declaration.
Show Data Elements
Immediately below the summary panel to the right of the form is a button (labelled 'Show data elements') as pictured below.

Clicking this will display a list of all the data that can appear in a declaration (as shown below) along with it's data element (D/E) number, SAD box number and whether it can be declared at header or item level or both.
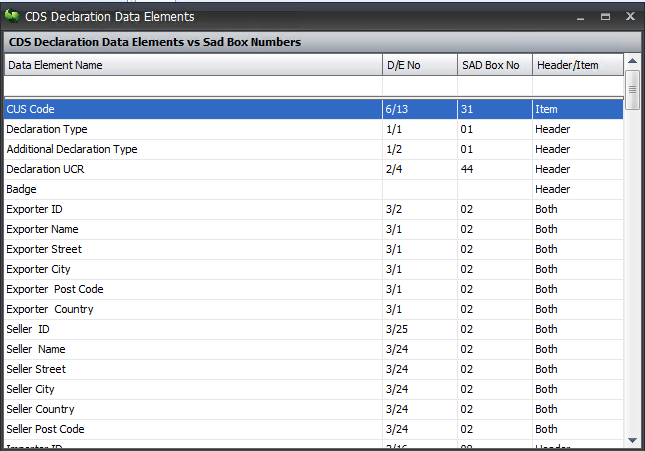
This list can be ordered and filtered like any other list in Sequoia. It can also be exported to a spreadsheet or other format by right-clicking on a row on the list and selecting 'Export To'.
Grids
Some data - such as Authorisation Holders or documents in box 44 - can appear more than once. This data is displayed in a grid (a list of information). Due to the amount of potential data now required on a declaration, these grids are initially 'collapsed' as shown below.

Each grid is labelled with the name of the data which it contains, together with an indicator of how many records it contains (2 in the above illustration). On the right-hand side of each grid is an icon ![]() to expand the grid.
to expand the grid.
Clicking the expand icon displays the grid as shown below.
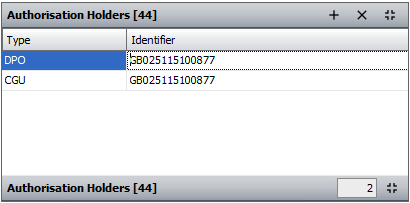
At the top of each grid (to the right of the label) there are 3 icons:
- + - to add a record
- x - to delete the selected record
 - to collapse the grid again (this is also on the right at the bottom of the grid).
Parties - Importer Exporter etc
Data for 'parties' - Exporter, Seller, Importer, Buyer, Declarant and Representative - can include the EORI number as well as name and address. Displaying all of this information all of the time would take up a lot of room on the form.
Therefore only the EORI number and name are displayed initially (as shown below). This is the same as CHIEF declarations.

If you are creating declarations from jobs then in most circumstances the correct parties will already be filled in.
To specify a party you can type in all or part of their shortcode, EORI number or name into either the ID or name box (as above).
If an exact CRM match is found then all of the details - EORI, name, address - will be filled in automatically.
If there is more than one CRM record matching the details you have entered then a lookup dialog will display.
You can select the required party (as illustrated below) by selecting the row and clicking the [OK] button, or by double-clicking the required row.
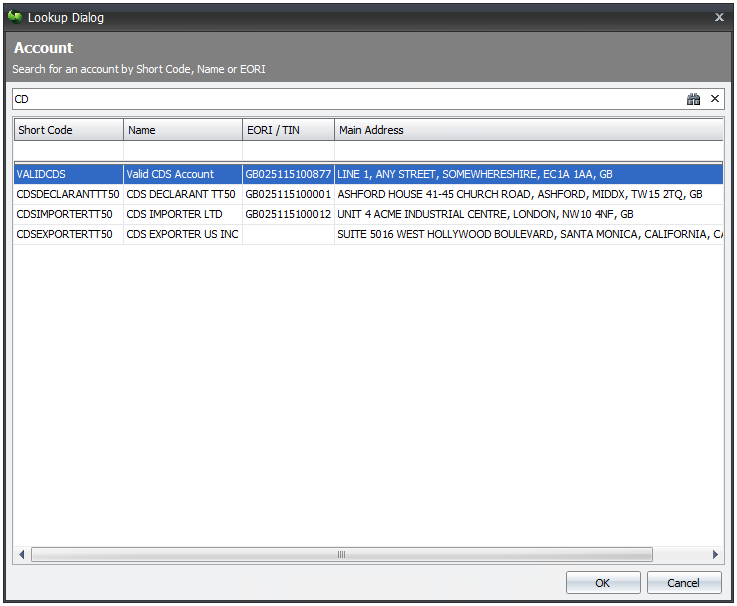
To the right of the name in the party control there are 2 icons:

- x - allowing you to delete all of the information currently entered.
 - to expand the control to display the address details.
Clicking the expand icon displays the address boxes as shown below.

Click the ![]() icon to the right to collapse the control again.
icon to the right to collapse the control again.
Lookup Dialogs
Wherever there is a box on a declaration form that requires you to enter a code (such as a country code or document code) you can display a list of available codes.
In most cases the box will have elipses (three dots) to the right - as shown below.

Not all boxes have these elipses - boxes on grids for example - but wherever a box requires you to enter a code, you can click on the elipses if they are there or enter ? - a question mark - into the box to display a lookup dialog.
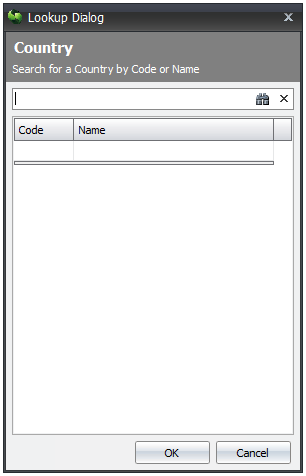
Initially these lookup dialogs display without listing any available codes.
Some lists can be quite big and displaying all records at the beginning could delay loading of the dialog.
If you know which record you are looking for you can key in all or part of the name or code into the search box at the top of the dialog, to narrow the search. Clicking on the  icon to the right of the search box will display a list of codes and associated information.
To select the required record you click on the row and then click [OK] - or simply double-click the required row. The selected code will be automatically entered into the box on the declaration.
Filtering lists
You can filter the lists displayed in a lookup dialog. Below each column header there is a text box; simply key into one of those text boxes to filter the displayed list - as illustrated below, where the name is filtered.
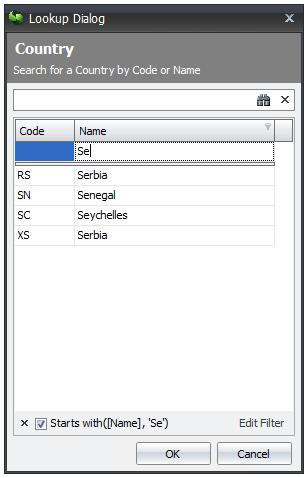
More complex filters can be applied by clicking [Edit Filter] at the bottom right of the dialog. You can remove the filter by clearing what you have typed or by clicking the 'X' at the bottom left of the dialog.
Ordering lists
You can also order the list by clicking on one of the column headers. Clicking once will order it in descending order. Clicking again will reverse the order.
SAD Box Numbers
Each control (text box, grid etc.) on the CDS declaration forms in Sequoia has a label next to it which includes the SAD box number in square brackets.
The boxes are laid out, as closely as possible, in SAD box number order in the same way as they are for CHIEF declarations.
To change the declaration forms to display the CDS data element numbers instead, please refer to this guide.
Navigating between items
The items tab of a CDS declaration (as shown below) does not have a fixed grid at the top, listing the items, like the CHIEF declaration forms do.
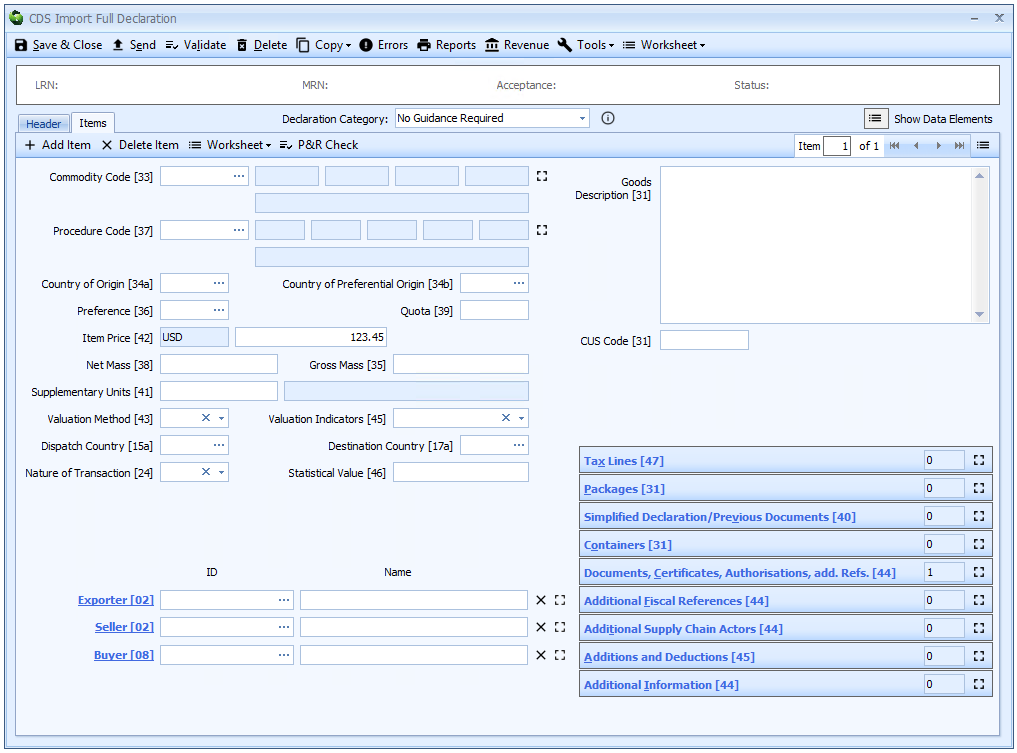
Instead there are navigation controls to the right (above the goods description box).
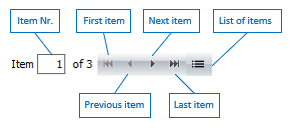
You can also type the number of the item you want to go to in the 'Item' box to navigate.
Alternatively, the ![]() icon to the right will display an old style list of items (as shown below).
icon to the right will display an old style list of items (as shown below).
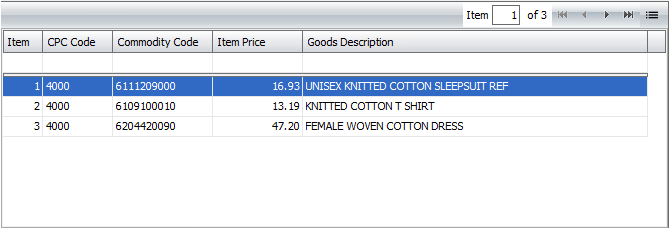
You can double-click an item on that list to navigate to that item or click the ![]() icon again to hide the list.
icon again to hide the list.
Show Messages
Once a declaration has been submitted, the Show Messages button will appear to the right of the declaration editor toolbar editor (as illustrated below).

Once clicked, this will display a panel giving information about all the messages sent and received for this declaration. Note - To hide the panel again, the button has now changed to [Hide Messages].
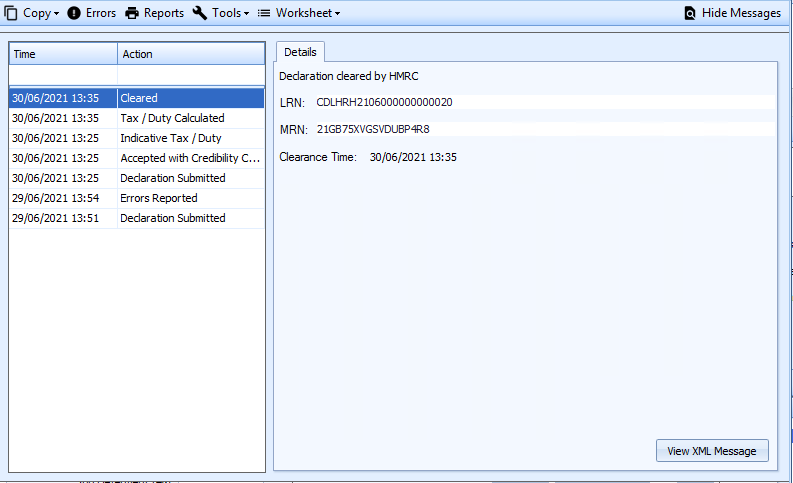
The list to the left of the panel details the actions/messages in chronological order. To the right of the list, significant details from that action are displayed.
At the bottom right, the [View XML message] button, if clicked, will cause the actual XML message to be displayed. This is essentially for diagnostic purposes. The contents of messages can be copied and pasted as necessary.
Declaration reports (ex C88, E2 etc.)
CDS declarations are based on different legislation to those in CHIEF. This new legislation mandates that all communication between trade and customs is electronic and therefore paper copies of declarations are not required.
However, it is recognised that importers and exporters at least – on whose behalf declarations are made by forwarders – will still want to see details of those declarations made in their name or on their behalf. For CHIEF declarations that requirement was usually satisfied with a ‘paper’ copy of the C88 (the data declared) and the CHIEF E2 (Entry Acceptance Advice) response.
In the absence of a consistent layout of this new declaration data, traders could be presented with different representations of the same data from different software applications, which would only cause confusion.
Whilst the legislation does include provision for paper-based declarations, this is based on the existing Single Administrative Document (SAD) on which the C88 is based. That 30 year old static layout does not accommodate all of the data potentially required in a CHIEF import declaration, let alone a CDS-compliant one. HMRC have also declined to provide a recommended layout for a document to replace the E2.
For that reason, the majority of software developers represented by the Association of Freight Software Suppliers (AFSS) collaborated in producing a single document that would replace both the C88 and E2 documents.
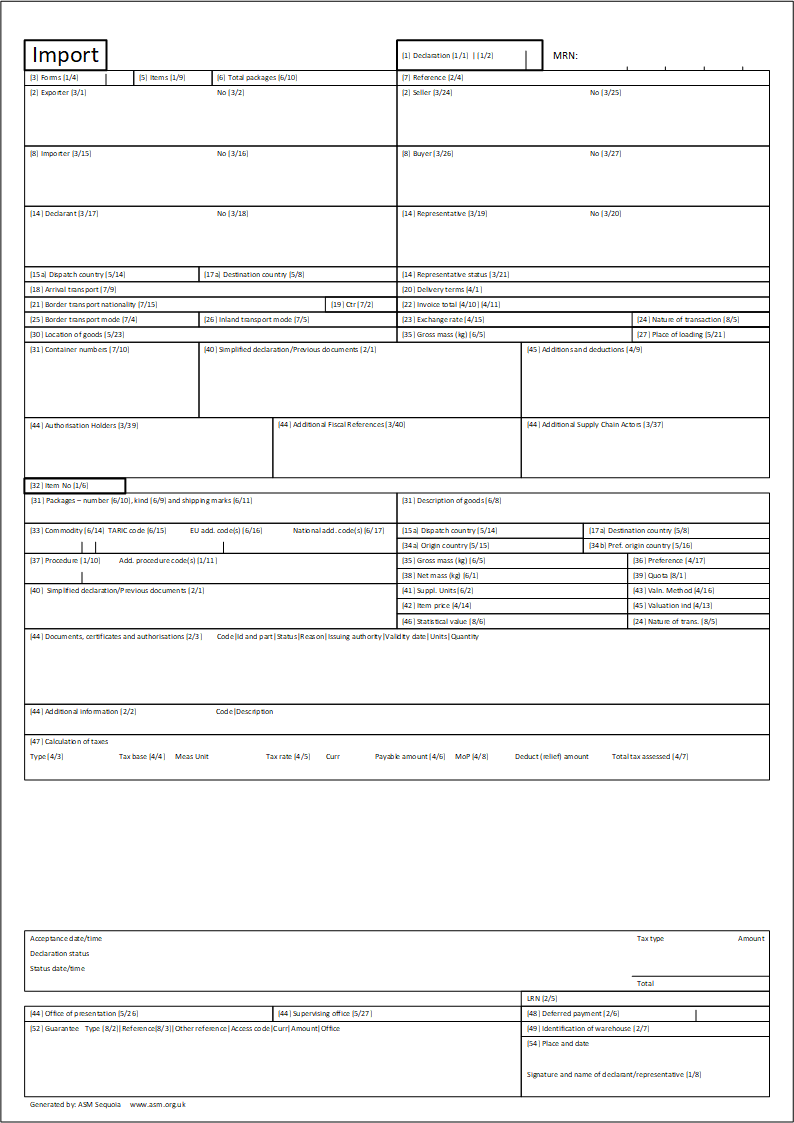
ASM were the originators of this collaboration and were instrumental in creating the definition and design of the new document and managing its development. It has the unofficial approval of HMRC. It is designed to display all of the data included in the declaration, something the old C88 struggled to do with CHIEF declarations. It also includes response (acceptance) data from CDS, such as the MRN and revenue details (both the totals and item level details) that were previously present on the E2.
The layout takes elements of the existing SAD layout where possible to provide familiarity and consistency with existing (CHIEF) documentation. It also utilises the idea of a ‘List of Items’ and ‘vertically expanding’ boxes from later customs documents (such as the EAD and ESS) to accommodate the additional data requirements of a CDS import declaration.
Each box containing data has the SAD box number, the name of the data included and the data element number(s), for example [14] Declarant [3/17]
The first ‘page’ (the header layout) also includes provision for a summary of the response data (previously included on the E2 report), including the latest status of the declaration as well as the revenue associated with it.
Therefore this layout is intended to be used as a single output to replace a combination of C88 and E2. The inclusion of status information also means it can be produced at any stage of the declaration process and reflect the contents of all notifications, thus replacing all of the old CHIEF reports.
To access the new CDS Declaration report, click [Reports] on the declaration editor toolbar (as shown below).

This will display a panel listing any already generated reports.
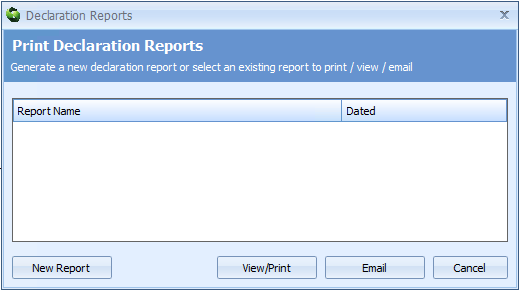
If a report has already been generated it will appear on the list. You can generate a new report - with up-to-date information on it - at any time by clicking the [New Report] button at the bottom left of the dialog.
You can also view and print the report and email it, in the same way as you are able to with CHIEF declarations.
The CDS declaration report header page layout
Declaration Validation
The way that validation works for CDS declarations differs to the way it worked for CHIEF declarations.
For the former (CHIEF declarations), validation began as soon as you typed anything into a declaration. That process was inefficient in that it couldn't possibly check if everything was OK with a declaration as soon as you filled in one box.
It displayed a whole list of errors, suggestions and comments which reduced the more you typed.
A lot of the validation spans different boxes on the declaration (e.g. if you've filled in this box then you also have to fill in that box). It is not until you think you have filled in everything necessary that it is really possible to check if that is the case and to give more accurate feedback.
Sequoia therefore takes a different approach to validation with CDS declarations. On the declaration editor toolbar there is a [Validate] button. Click this once you have completed the declaration, to check that you have completed everything necessary.
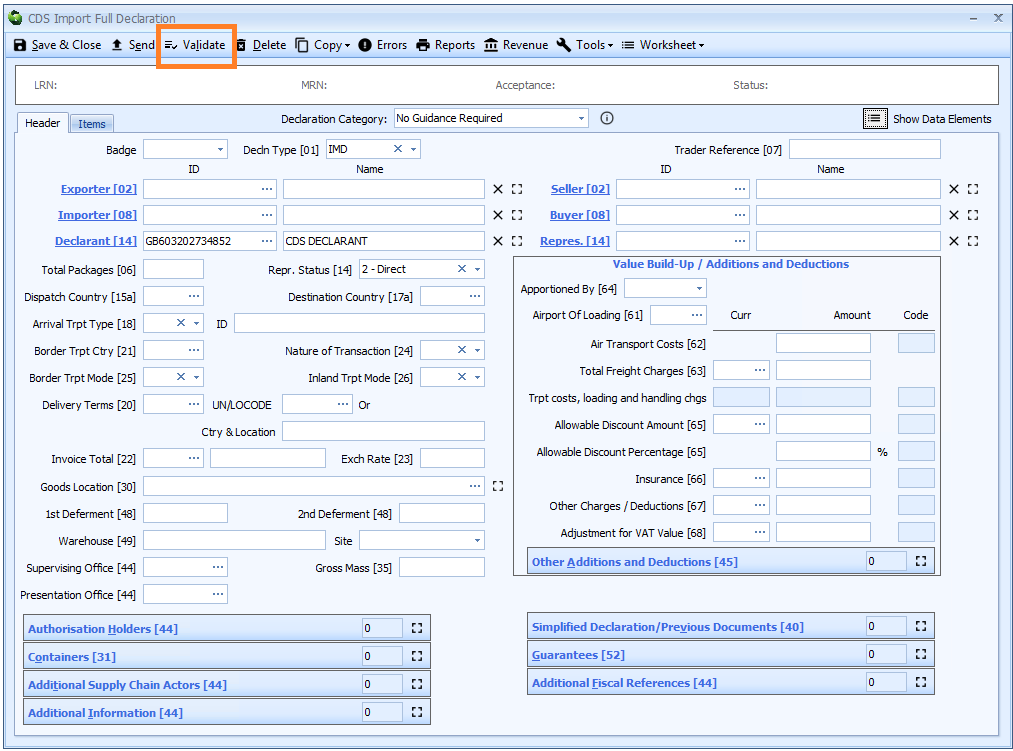
Once you have clicked the [Validate] button, if there are any validation errors to report, the Declaration Validation dialog will display (as shown in the example below).
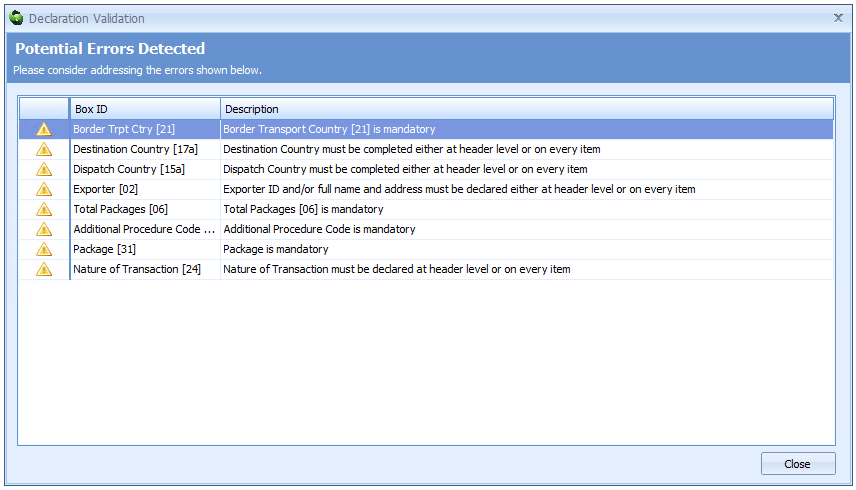
This will list all the validation errors/warnings based on what you have keyed in to the declaration. The first column of the list will indicate whether it is
- an error (with a red icon), in which case the declaration cannot be submitted until the error is corrected
- a warning (with a yellow icon) which can be ignored and the declaration submitted if you wish. Note that ignoring these warnings could result in the declaration being rejected.
You can leave the validation dialog open while you click back onto the declaration editor to address a warning/error. Once corrected, that particular row on the validation dialog will disappear. You can click back and forth between the declaration and the validation dialog until you are satisfied with the results. You can then manually close the validation dialog but, if you don't, closing the declaration form or clicking [Send] to transmit it will automatically close it
Declaration Revenue
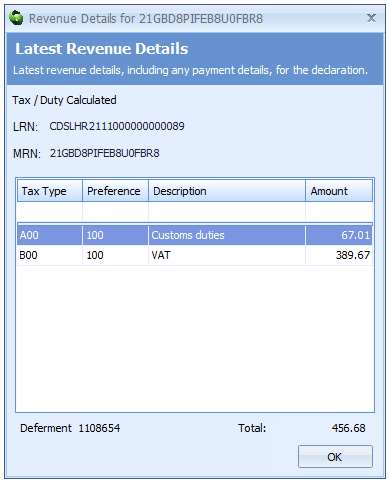
Once a declaration has been submitted and revenue details have been calculated by CDS, these details will be stored against the declaration in Sequoia. To view these details, click the [Revenue] button on the declaration editor toolbar (as shown below).
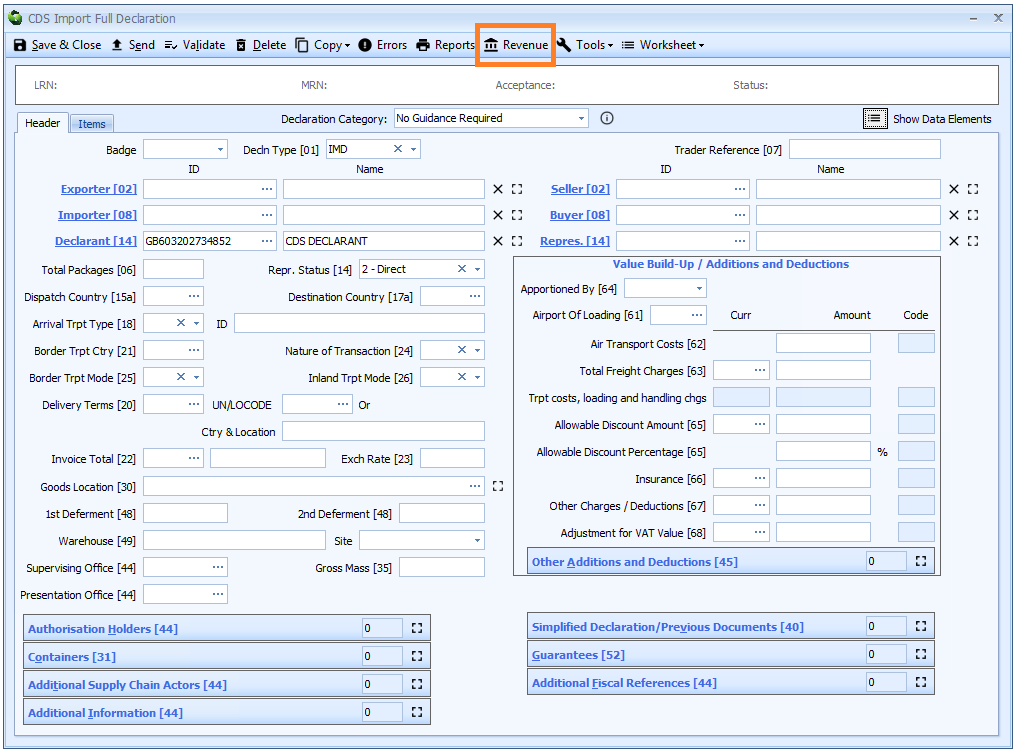
This will display the Revenue Details dialog which lists revenue totals bu tax type.
