
CFSP - Create SFD and Link ISD declaration
Sequoia v1.0
Configuring CFSP Traders
To complete CFSP entries for a customer you will need to configure the CRM client and define what declarations you will be completing.
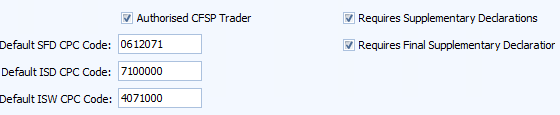
Set Trader & Default CPC codes
- Open the CRM Client and select 'Declarations' page.
- Complete the:
- 'Authorised CFSP trader'
- 'Requires Supplementary Declarations'
- 'Requires Final Supplementary Declarations'
- Set the default CPC for the various declaration types. Setting these will add the CPC to the declaration on creation.
- Click 'Save'
Setup Automatic AI Statements & Document Codes
Save AI statements and Document Codes that can be used in Declaration[s] where the CFSP Trader is used. Adding the CPC set earlier and ticking automatically insert will add the AI Statement / Document Code when the CPC is used.
- Open the CRM Client and select 'AI Statement' and/or 'Documents' page.
- Complete details
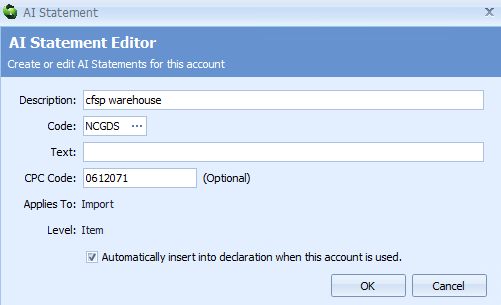
- Click 'Save'
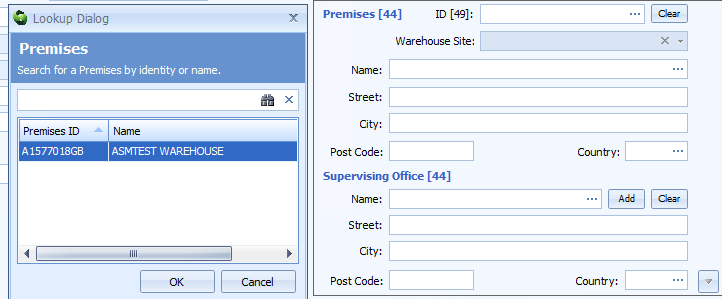
Save Warehouse Premises
Save 'Warehouse Premises' that will be used in Declaration[s] where goods will be put into warehouse.
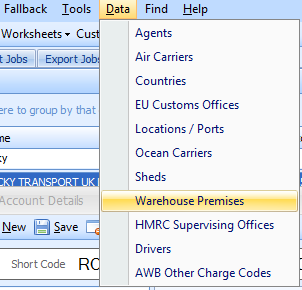
- Open 'Data' toolbar
- Click 'Warehouse Premises'
- Click 'New'
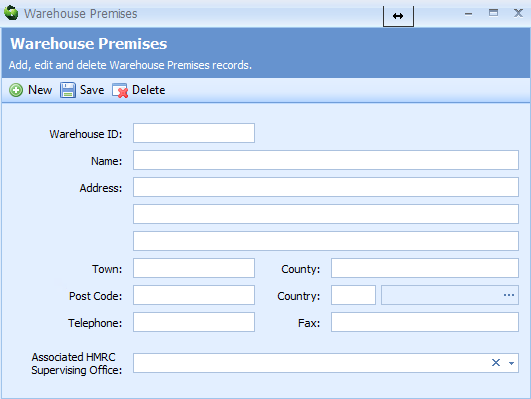
- Complete the warehouse ID
- Complete the warehouse name and address
- Associate a Supervising Office to automatically be used when the warehouse is selected. If the Supervising Office will always be different leave this blank
- Click 'Save'
Create CFSP Frontier Simplified Declaration (SFD)
- Find CCS-UK Inventory record
- Right Click Inventory record to create 'New' Job
- Select SFD (CFSP Simplified Frontier Declaration)
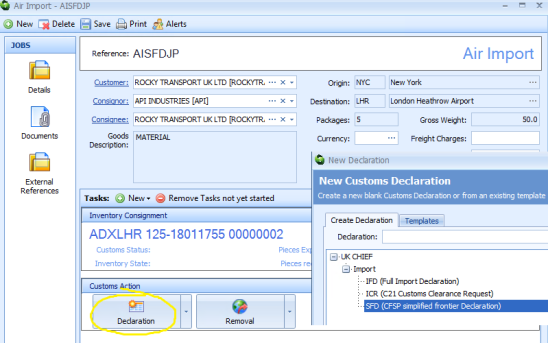
- Complete the declaration as required
- CPC code will default to what was setup in CRM
- The 'AI Statement' will default
- Add Warehouse Premises & Supervising Office if putting into warehouse
- Send Declaration
Link ISD (Supplementary declaration) to SFD
- Open the Job the SFD was created on
- From the Task header above Shipment Task, select 'New' > Customs Action Task
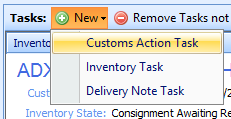
- This will add a second 'Declaration' task
- This will add a second 'Declaration' task
- Click 'Declaration'
- Double click ISD (Supplementary Declaration for Imports)
- Complete as normal
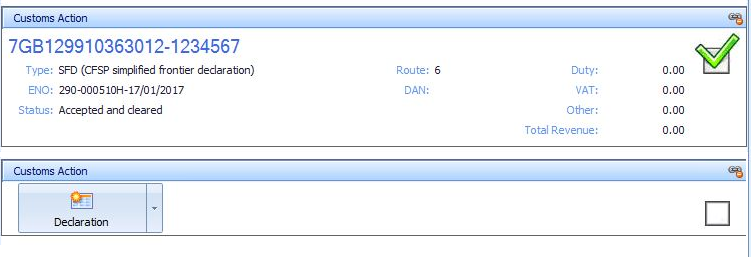
- The 'Acceptance Date/Time' defaults to the acceptance of the frontier (SFD)
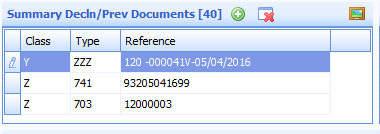
- Box [40] Previous Documents automatically adds the SFD entry details
- Send Declaration