
CRM - Bulk import account data
Overview
You can import information from several companies/ accounts to automatically create multiple account records, saving you the effort of having to create them manually. This can be done in the Sequoia Toolbox application which is only available to run on the Sequoia Server. The Sequoia Toolbox is not intended for day to day use, and can only be accessed by someone with access to the Sequoia Server. The data you wish to import must be in a CSV file format.
Launch the toolbox and get ready to import
Launch the toolbox application on your Sequoia Server in one of the following two ways (depending on your operating system):
-
If you have a Start menu, click on it, locate the Sequoia folder and click on the Toolbox icon.
-
Open File Explorer. Navigate to your Sequoia Server folder (typically installed in
c:\Program Files x86\ASM\Sequoia Server). Navigate to the Toolbox sub folder. Open the file calledASM.Sequoia.Toolbox.exe.
The ASM Sequoia Toolbox will appear.
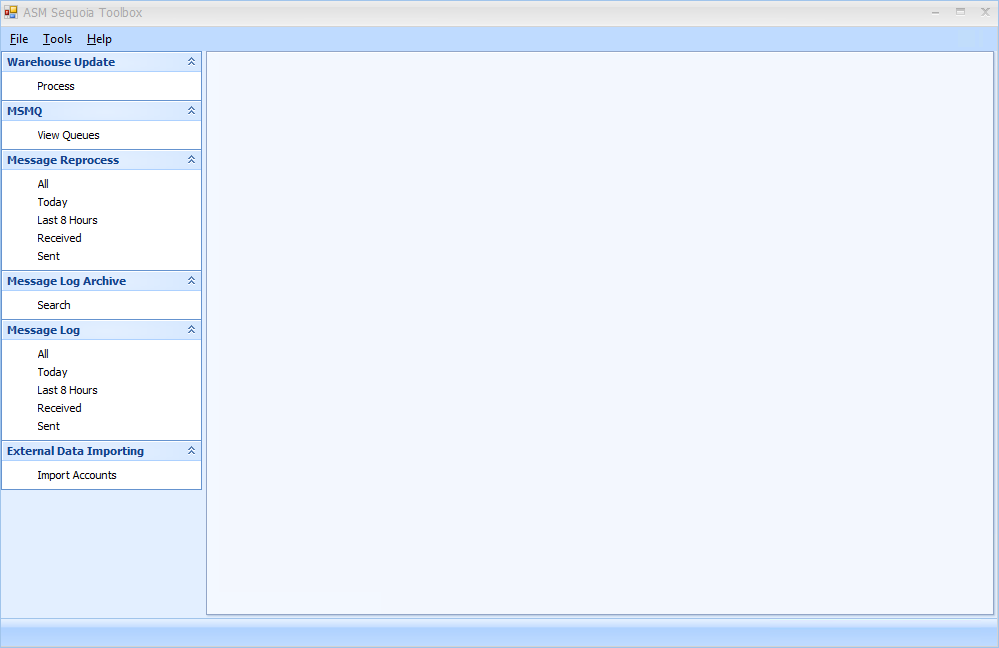
If the External Data Importing menu is not expanded in the menu bar on the left, expand it.
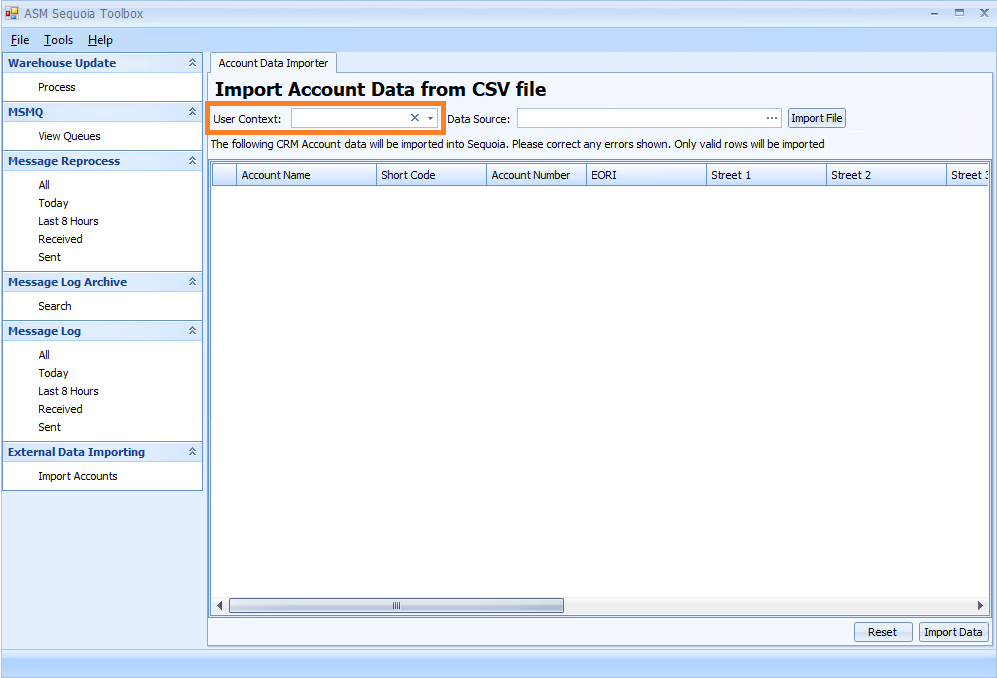
Click on Import Accounts. The Account Data Importer tab will appear on the right hand side of the screen.

How to import
Click in the User Context box and a list of all your users will appear in a drop down list. Select the user who will be importing the account records. Usually you will find and select your own user account, however, if you do not have a Sequoia user account and you are using another person's account, please ensure you have their permission.
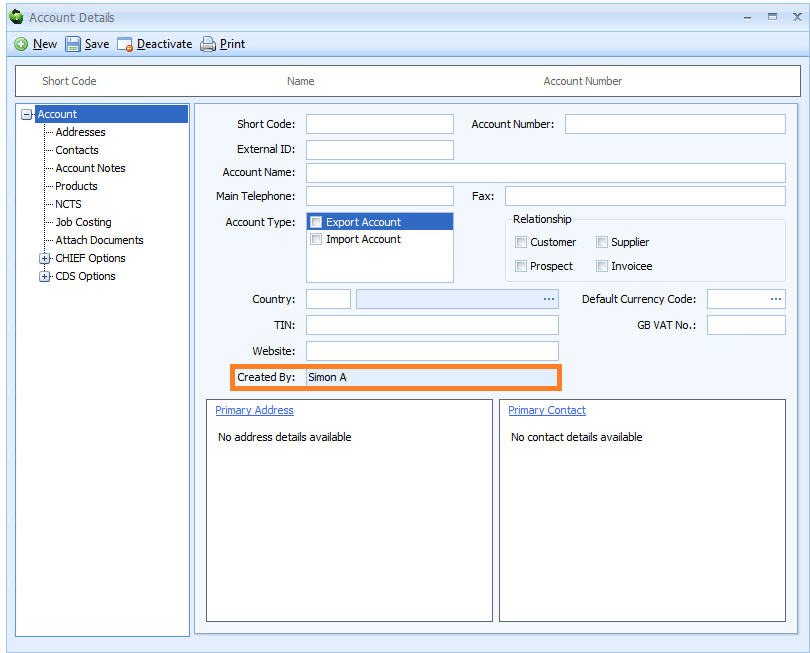
In the Account Details editor of any account record created by this user, this user's name will appear automatically in the Created By box in the Account node.
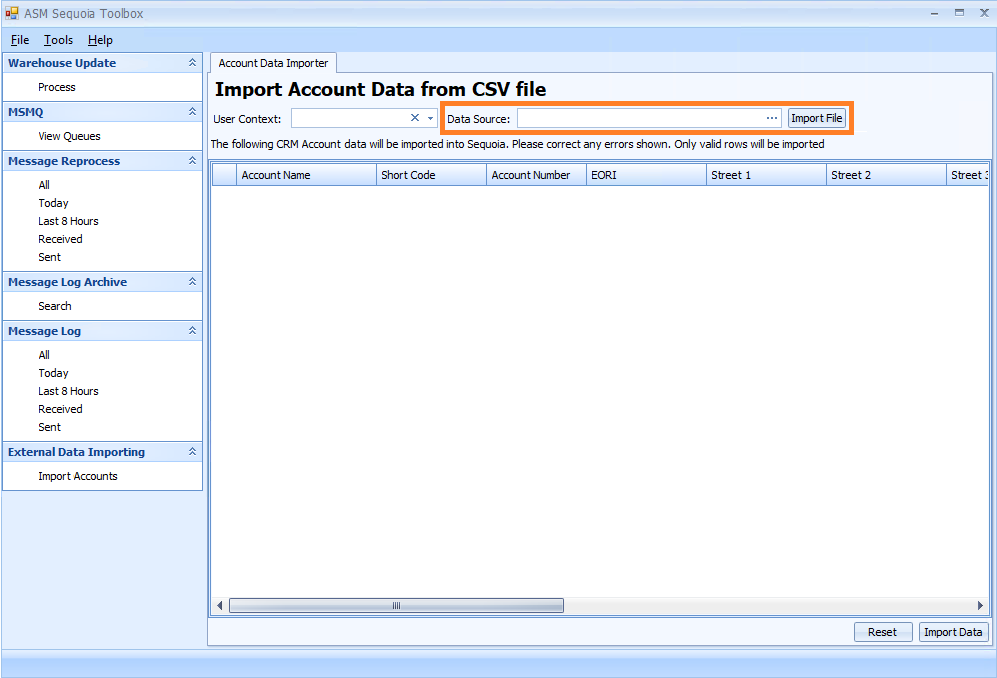
Next, in the ASM Sequoia Toolbox, click in the Data Source box. You can type or paste the file location into this box. This file location needs to be fully qualified, for example, - i.e. c:\users\jane doe\desktop\accounts.csv. You can also find and select your data file from your computer's file system by clicking on 3 dots (the ellipsis) to the right of the Data Source box. When you have selected a file, click on the Import File button. If the file exists, data will be imported. If the file does not exist, you will be prompted to specify a valid file location.
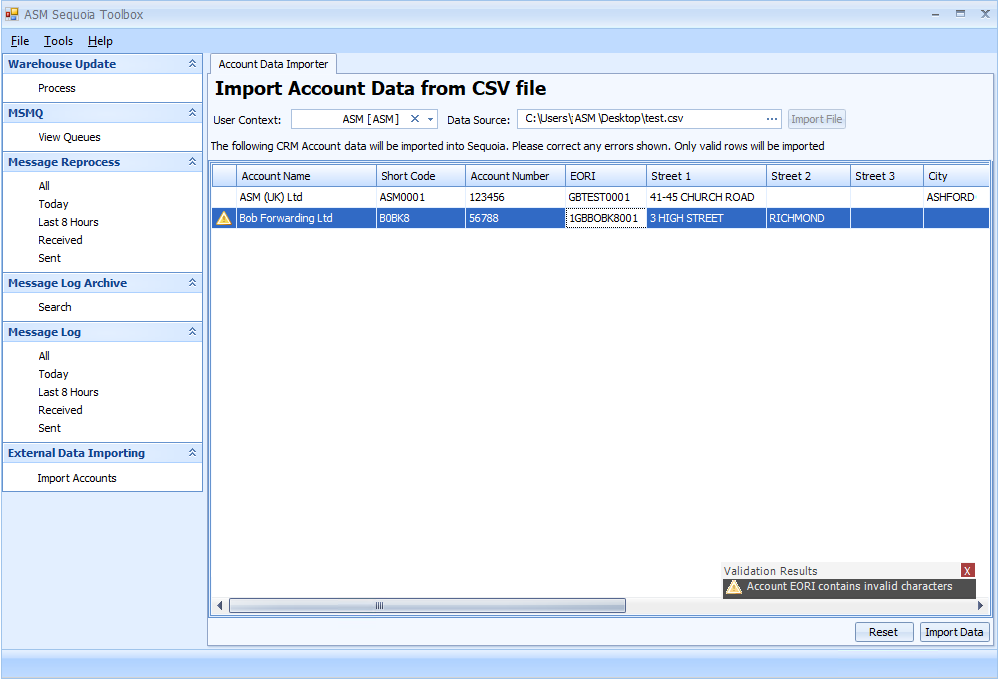
All data will be imported from the CSV file into the data grid, so that you can preview the data that will be imported into Sequoia. An example of a simple data import is shown below. In this example, there is one record which is showing an error warning (the yellow triangle on the left). Rows which have one or more error warnings will not be imported until the error is corrected. When selecting a row with warnings, a full description of the error warnings will appear in the Validation Results pop-up box at the bottom right of the screen (as shown). Once these errors have been corrected, the error warnings will disappear.
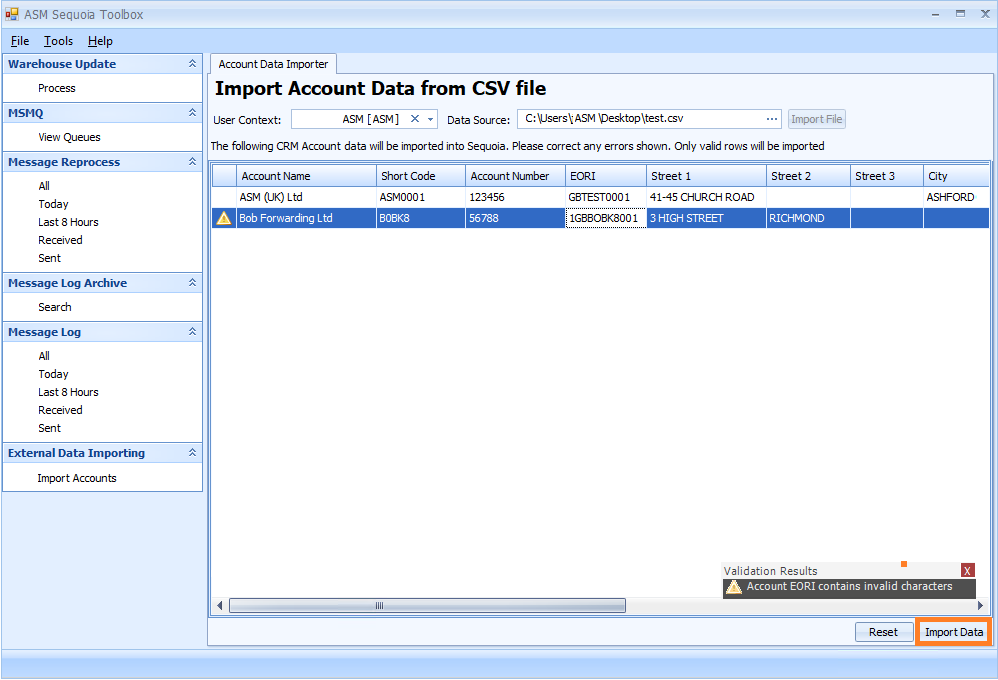
Import the data within the preview data grid into Sequoia by clicking on the Import Data button. If you try to import one or more account records, only records which do not have error warnings (accounts which are valid) will be imported. All remaining records which have not been imported will remain in the list so they can be corrected, and the importation process can be tried again.
Resetting the form
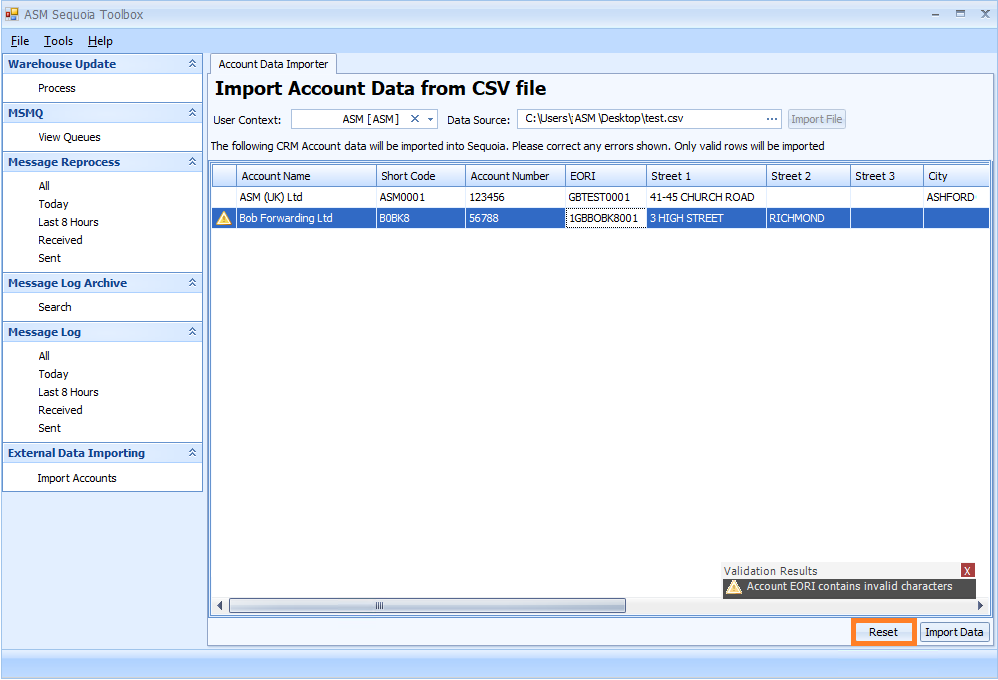
The form can be reset so that another CSV file can be processed by clicking on the Reset button. You will be prompted to clear existing data, and if you choose to, the form will be reset so you can start the process over again.
Overwriting existing accounts in Sequoia
You cannot use this tool to overwrite existing account data in Sequoia. If you try to import an account record with a short code that matches an account already in Sequoia, the import (for that particular account record) will fail and you will receive a warning against that line on the left. The account record with the same shortcode which is already in Sequoia will remain unchanged.
CSV file format
A CSV file is a delimited text file that uses a comma to separate records. This file type is commonly used for data exchange between computer systems and is widely supported. You can even save Excel data in CSV format. The CSV file should not have a header row (a row which lists the field names should not be present), and the order of the data must be exactly as described below. Every field below should be represented within the CSV file.
The table below shows the supported CSV file format.
| CSV Field | Optionality | Data Format | Max Length |
|---|---|---|---|
| Account Name | Mandatory | Any character | 200 |
| Short Code | Mandatory | Any upper alpha numeric character | 20 |
| Account Number | Optional | Any character | 200 |
| EORI | Optional | 2 upper alpha characters followed by up to 15 upper alpha numeric characters | |
| Street 1 | Mandatory | See address restrictions below | 50 |
| Street 2 | Optional | See address restrictions below | 50 |
| Street 3 | Optional | See address restrictions below | 50 |
| City | Optional | See address restrictions below | 50 |
| State | Optional | See address restrictions below | 50 |
| Post Code | Optional | See address restrictions below | 20 |
| Country Code | Mandatory | 2 upper alpha characters only | |
| Telephone | Optional | Any character | 50 |
| Fax | Optional | Any character | 50 |
| Deferment Prefix | Optional | The letters A or B or C only | |
| Deferment Number | Optional | 7 numeric characters | |
| Default Representation | Optional | The letters D or I only |
Address Field Restrictions
The same rules for creating a record within the Sequoia client application apply when importing data using the bulk import utility. The application will inform you of any problems with data that may exist within the preview data grid. These rules and restrictions are enforced to ensure that Sequoia behaves correctly with your new account data.
The importation utility imposes further address field restrictions. Only the following characters are allowed:
| Character | Restriction |
|---|---|
| Letters, upper case | A to Z |
| Numerals | 0 to 9 |
| Space character | |
| Full stop | . |
| Comma | , |
| Hyphen/minus sign | - |
| Opening parentheses | ( |
| Closing parentheses | ) |
| Oblique stroke (slash) | / |
| Apostrophe | ' |
| Plus | + |
| Colon | : |
| Equals sign | = |
| Question mark | ? |
| Exclamation mark | ! |
| Percentage sign | % |
| Ampersand | & |
| Asterisk | * |
| Semi-colon | ; |
| Less-than sign | < |
| Greater-than sign | > |